Thinking about planting your own vegetable and flower seeds? Starting seeds indoors can be tricky, yet rewarding. We’re here to help you with our tips for starting seeds indoors.
Disclaimer: Some of the links below are referral links,
which means that if you make a purchase, there is no extra cost,
but Running A Household will receive a commission.
Tips for Starting Seeds Indoors
1. Start with clean seed trays
We prefer this Plant Start Dome Tray because it has everything you need: 72 cells to plant seeds, a tray and a greenhouse cover. This kit is great because you can reuse it each year. Just be sure to wash them before reusing.
2. Use the right soil
You’ll need a Seed Stating Potting Mix that is specially formulated for starting seeds. Here’s the one we use:
Miracle-Gro Seed Starting Potting Mix
3. Pre-moisten your soil
I’ve always used brand new seed starting soil, but never pre-moistened it. This step is important and so easy to do. Grab a bowl, empty the soil, add water and mix until all of the soil is wet but not soaking. Next, fill your seed trays with the pre-moistened soil. Be sure to pack it in gently to remove any excess air.
4. Plant your seeds at the correct depth
Now it’s time to add your seeds and cover them with soil. Follow the instructions on the package. Make sure to plant the seeds at the correct depth and not too deep.
Some seeds, like snapdragons, actually need light to germinate. There’s no need to cover them with soil. Instead follow the directions on the package. My snapdragon seed package states, “Sow seed thinly and barely press into seed starting formula.”
5. Use vermiculite to absorb moisture
Consider lightly covering your seeds with Organic Vermiculite. This will keep the moisture in, but will also prevent excess moisture which can cause mold to grow.
6. Water your seeds lightly
Next you need to water your seeds. I’ve always done this with a mini-watering can. It’s actually better to use a spray bottle to gently mist your newly planted seeds. This keeps the seeds in place, and prevents you from overwatering.
I’ve also used a water bottle with an adjustable top. By pressing the top in far enough, I was able to get only a drop or two out at a time. Much butter than saturating your newly planted seeds with water from a watering can.
7. Consider using a dome to keep seeds moist
Using a dome to cover your newly planted seeds is optional. I’ve always used a dome to cover my newly planted seeds. The day I see the seeds sprout, I remove the dome. I have to admit, that I didn’t always catch it in time. Not to mention, I may have overwatered my plants because I was using a watering can. As a result, a white mold formed on some of my seedlings. I’m planning to try the greenhouse dome on my first batch of seedlings, and will leave it off on my second batch which require less moisture to germinate.
Now that your seeds are planted, let’s talk about taking care of them.
Taking care of seedlings: light, heat and water
Where should you put your seed trays?
You’ll want to check the instructions on the seed package. Many seed trays can simply be placed in a bright location with indirect sunlight until they sprout.
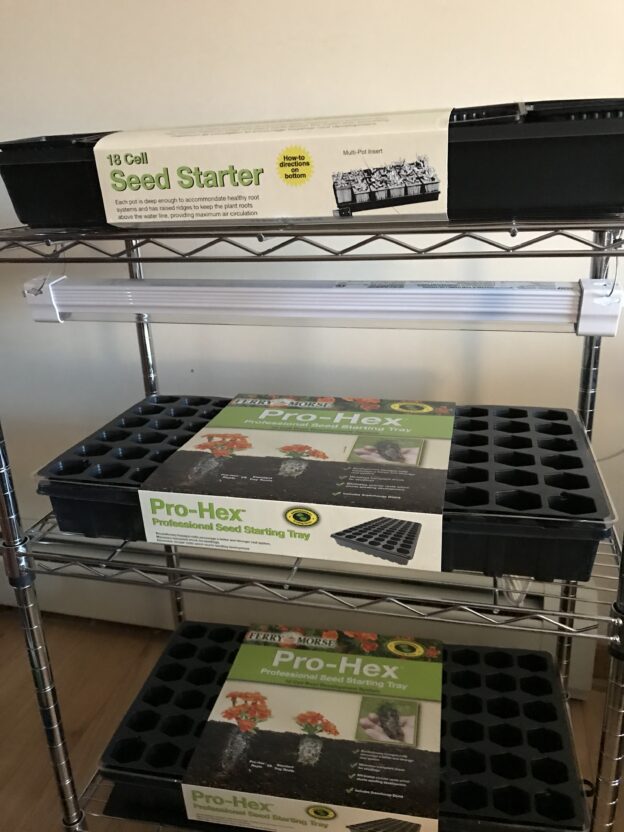
This year, I bought a small inexpensive rack to hold the seed trays. The rack shelves are the perfect size for my seed trays.
Steel Wire Rack (23.3L x 13.4W x 30H)
This wire rack has three shelves and will allow me to attach a grow light.
How much light do seeds need once they germinate?
Once your seeds have sprouted, they typically need about 12-16 hours of light. Many gardeners successfully place their seed trays in a sunny window. This method doesn’t work for me. Once my seeds sprout, they get very leggy trying to grow toward the sun.
This year, I bought a simple grow light and attached it to my new self. Grow lights work better than natural light because you can adjust the height so that the light is close to the seed tray. This allows the plants to grow straight and strong instead of tall and leggy.
Grow lights also allow for longer hours of light. In March, we typically have 11 hours of light. Seedlings need 12-16 hours of light per day. So even on cloudy/rainy days, the grow light provides the required bright light.
Water: Once the seeds have sprouted, you can consider watering them from the bottom. This method involves placing a reservoir or tray under the seed packs. As a result, the plants to establish deeper roots, and soak up the water from underneath.
I hope you find these tips helpful. Happy gardening! 🙂
Are you looking for a way to keep track of the seeds you purchased? Be sure to check out our free checklist:

Garden Shopping Checklist: Track your seed and plant purchases


